Note: Video for this Blog Post is Here.
When dealing with cloud resources the two opposing needs are security and accessibility. When we often deploy resources in a private network inside of an AWS VPC that are not accessible directly from the outside. To access these resources, we can use a bastion server or VPN.
The bastion server is a server that is accessible on the public network but also has a connection into the private network. The drawbacks of of a bastion server is that you would have to login to it to do your work. Most of my development is on my laptop and I like using the tools on my laptop as opposed to some server that may not have the tools. We can configure SSH tunnels, but this can also be a hassle.
AWS has a managed Client VPN service that allows us to access this remote network and internal resources pretty easily. I’m usually not a fan of client VPNs as it reminds me of big corporation life. But the fact that I can tweak it and manage it with split tunnel and authenticate with my company GMail account makes it a pretty cool option.
1. Google G Suite Setup
Special shout out to Stack Overflow for helping with this as it was the hardest part!
- In your G Suite Admin account go to the Admin Console. Select Apps.
- Select SAML apps
- Add custom SAML app
- Give it a name like Castle Rock AWS
- Under Service Provider details:
- ACS URL:
https://127.0.0.1:35001 - Entity ID:
urn:amazon:webservices:clientvpn - Check Signed Response
- Name ID
- Name ID format:
UNSPECIFIED - Name ID:
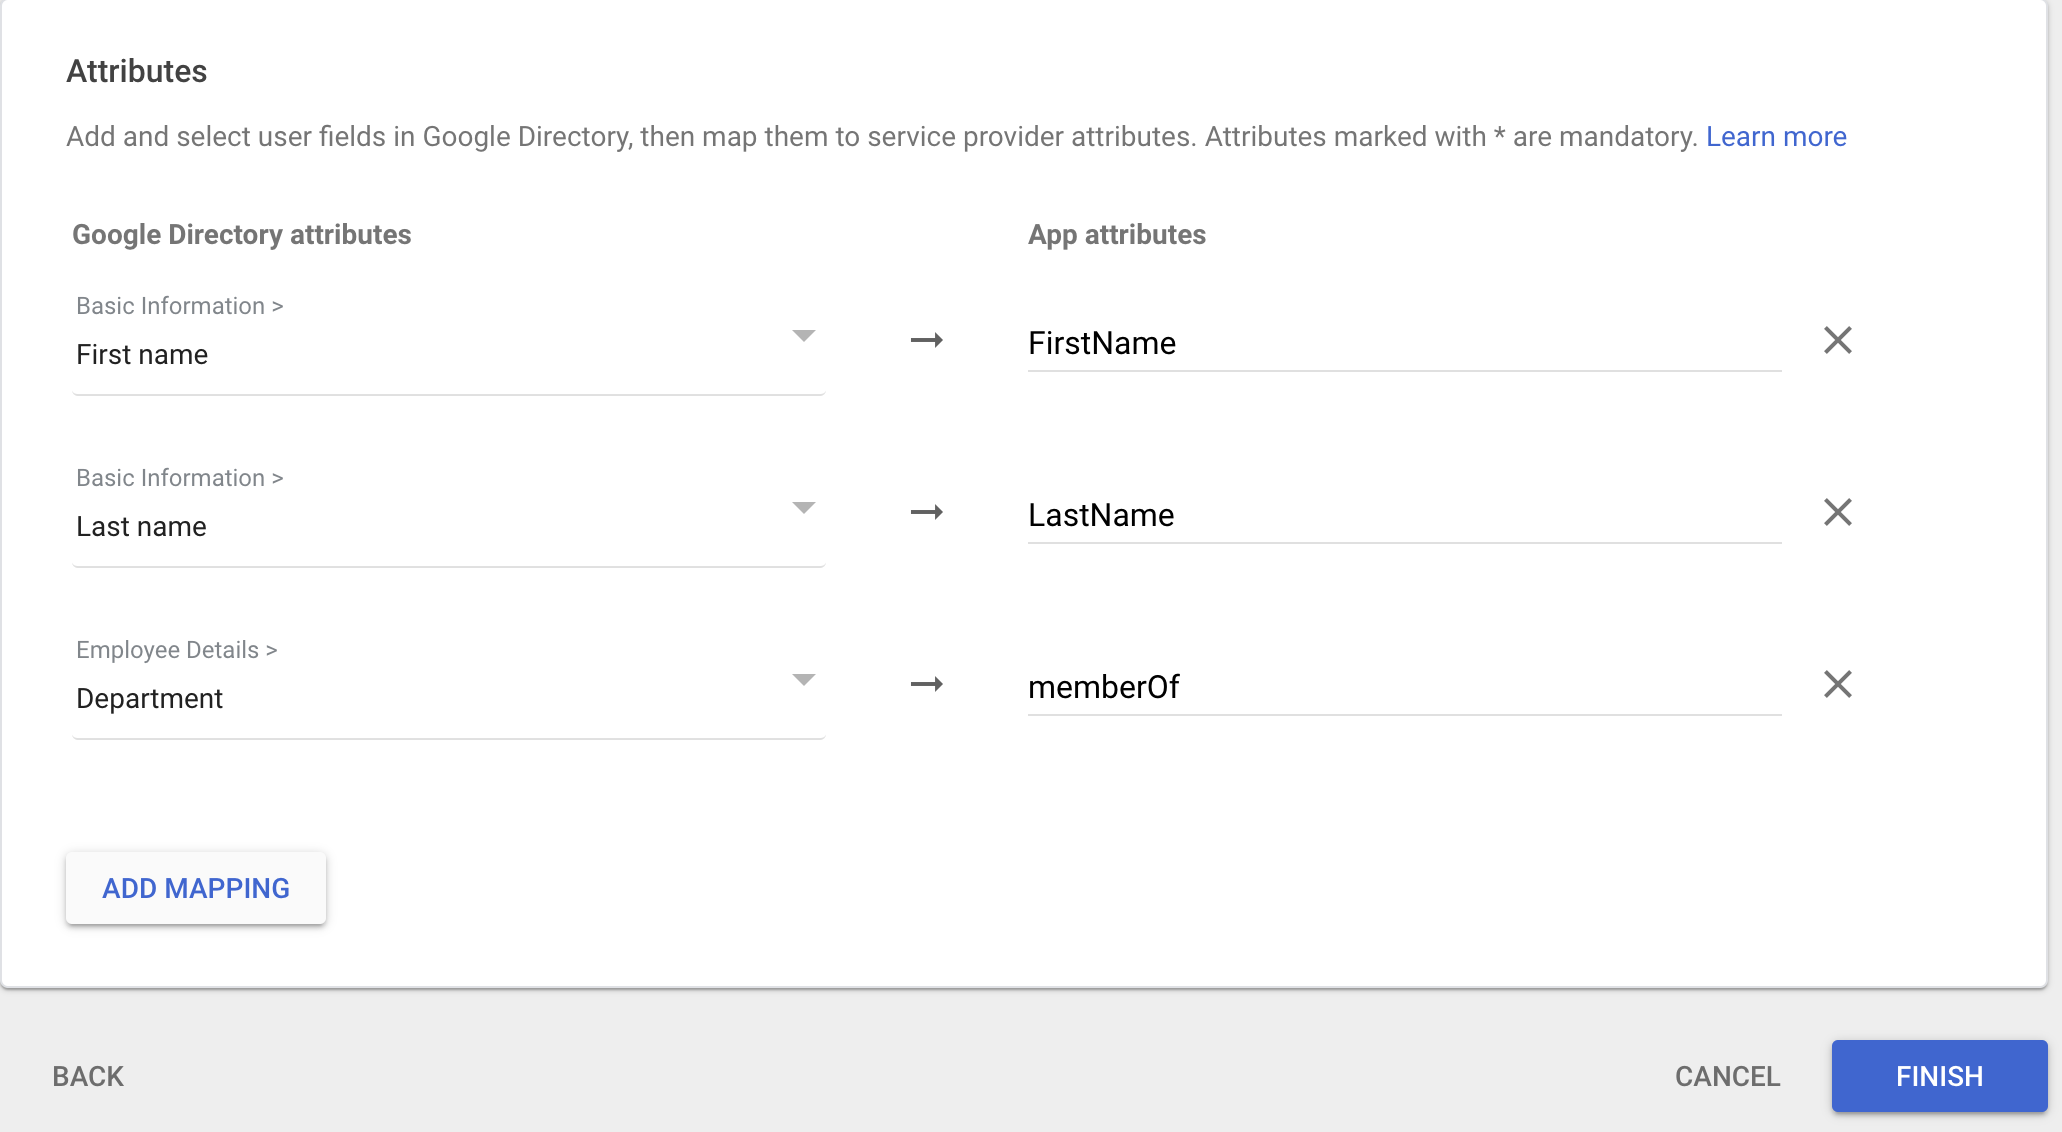
Basic Information > Primary email
- Name ID format:
- ACS URL:
You now need to add the mapping. The SAML docs tell you how this should be:
1.1 Google Apps Correction
Google SAML requires that you use https but Amazon isn’t having any of that. Amazon specifies it wants http://127.0.0.1:35001. In order to get around it, you have to hack Google. Once your new SAML app is created, go to edit the Service Provider Details. Change the 127.0.0.1 to something like 127.0.1.1. I do this in Google Chrome. Then open the console and navigate to the Network tab. Monitor the network and hit save. You should see some webpage load called batchexecute…

Now, right click and copy as cURL
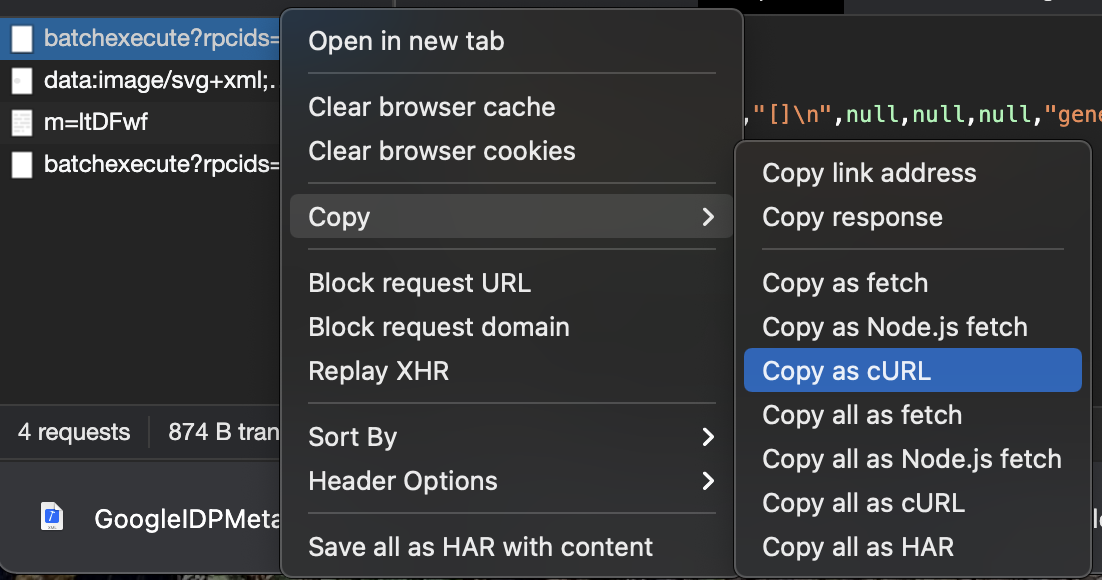
Open up a terminal and paste all that madness in it. (I saved my to /tmp/foo) Then find the 127 and change it to http as well as the 127.0.1.1 to 127.0.0.1

Next, run that curl command:
bash /tmp/fooThat should then set you up. Refreshing your G-Suite SAML apps dashboard, you should now see that it is set to http://127.0.0.1
1.2 Create SAML in AWS
Download the Metadata XML file from Google. Then go to your downloads folder and run:
aws iam create-saml-provider --saml-metadata-document fileb://GoogleIDPMetadata.xml --name CastleRockSAML1.3 Configure Users
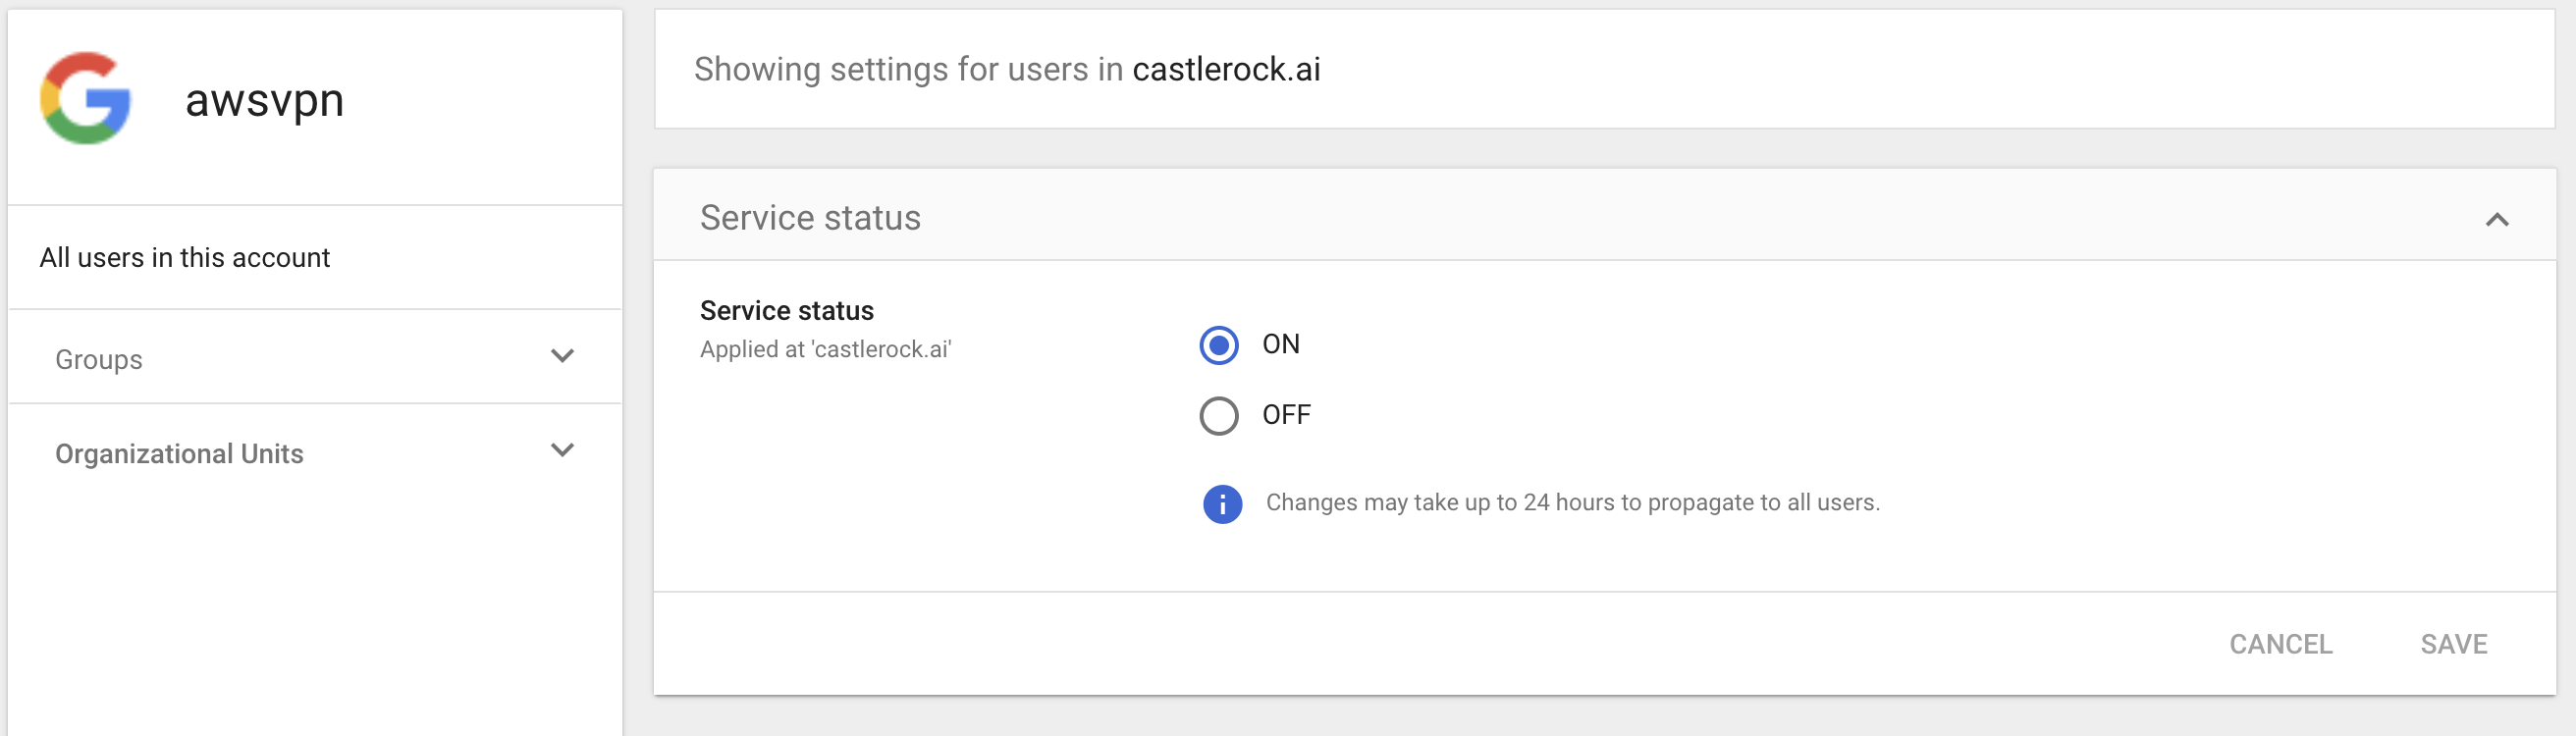
You may have some users or all users you want to add into the VPN. You can configure this now at the Service Status. Make sure whoever you test with has access. The most simple is to give all users with your domain access. This works great for small companies.
2. Client Certificate Setup
The next step is you need to generate a server certificate for the VPN connection. We can follow some of the steps Amazon provides to do this.
git clone https://github.com/OpenVPN/easy-rsa.git
cd easy-rsa/easyrsa3
./easyrsa init-pki
./easyrsa build-ca nopass
./easyrsa build-server-full server nopass
We need the pki/issued/server.crt, pki/private/server.key, and the pki/ca.crt. With those we run:
aws acm import-certificate --certificate fileb://server.crt --private-key fileb://server.key --certificate-chain fileb://ca.crt --region regionIf you want to be able to authenticate without Google Mail for other users like contractors outside your company, you can generate the build-client-full instructions like Amazon says as well.
At this point you should have the keys up in AWS Cert Manager. You are almost there!
3. Set up Client VPN Endpoint
We fill the form out with the following values
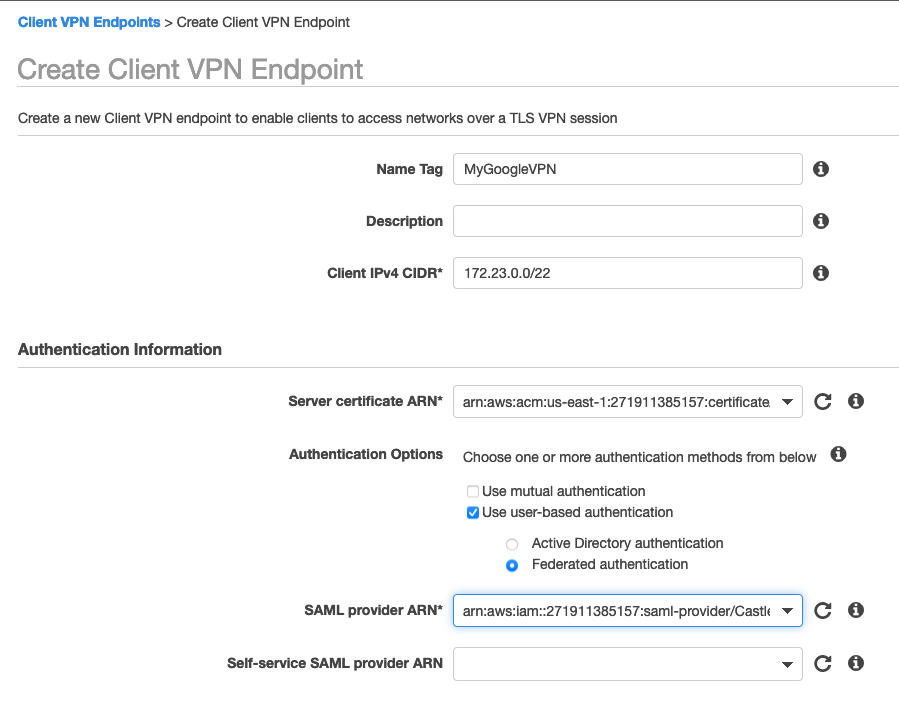
Our IPv4 CIDR should not overlap with any of the CIDRs in your VPC. My VPC is all 10.21.0.0/16 so 172.23.0.0/22 works pretty well. The netmask has to be between 16-22. We are using the self signed certificate we generated and the SAML provider we generated with the Google ID. The rest of the details you can leave as default or configure as you want. Be sure to enable split tunnel or your users will hate you.
4. Configure VPN Connections
At this point all the hard work is done. You now just need to associate the VPN with the VPC you want it to join and add the subnets you want it to be able to reach. Set up routing and authorization as specified in the documentation. For my simple purposes I added the subnet to the VM I was looking to attach to. If I had an EKS cluster I’d have put it in the same subnets to be able to access the control plane.
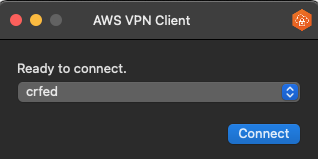
5. Connect with VPN Client
You can download the VPN configuration from the Client VPN dashboard.
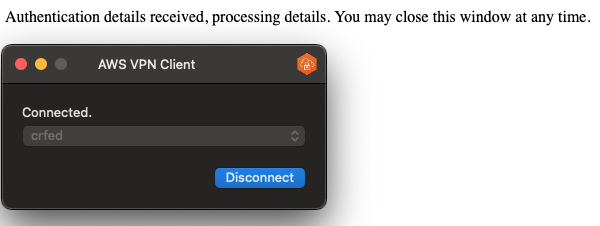
The AWS OpenVPN client can be downloaded from here. Importing the configuration our users will be presented with their Google SSO page to access the VPN.
At this point, if we have configured the VPN to be able to access the subnet our VMs or resources we’re interested in are on, we are able to connect to them without a bastion server. Connecting to Databases are simple as well and we do it in a secure way without exposing these services over the internet.
Our SSH config file has the following entry:
Host vpntest
  User ec2-user
  Hostname 10.21.101.93
  IdentityFile ~/.ssh/vallard01.pem
We simply connect with ssh vpntest and are immediately on the server. So easy! …Well at least it was after we set it all up.